This detailed guide will clearly explain how to do a front tuck somersault safely and successfully. The front tuck is an advanced skill so therefore requires plenty of drills and preperation before being able to master it.
Disclaimer: Gymnastics carries an inherent level of risk. Whilst the suggested activities are proven to be effective by experienced coaches we cannot take responsibility for injuries caused when attempting to perform the skills shown. We always recommend practicing with qualified professionals in a recognized gym facility.
What is a Front Tuck?
A front tuck is a flip (sometimes called a somersault) skill where you jump forward, rotate in the air in a tucked shape, and land on your feet. Imagine doing a front roll in the air and landing on your feet and you have a good idea of what a front tuck is.
Mastering a front tuck represents a significant milestone in gymnastics, cheer or tumbling. It’s usually the first flip type skill which a gymnast will learn and it’s impressive once completed.
As well as looking impressive, the front tuck enables gymnasts to begin working on more complex tumbles such as Front tuck walk out or handspring into front tuck. These families of tumbles can then in turn be extended and increased in difficulty.
Preparations For A Front Tuck
Let’s start with the physical body preparation needed for a front tuck. You will mainly need core strength and leg power in order to create enough height and then tuck in quickly. Include these exercises in your routine:
- Squats: Strengthen your leg muscles.
- Crunches: Improve core strength.
- Jump squats: Increase explosive power for better height.
You will need to have already mastered the following skills before starting to learn a front tuck:
- Tuck, stretch and hollow dish shapes
- Tuck jump
- Front roll
- Landing position
Good flexibility helps you hit the right shapes prevent injuries. Stretch regularly and warm up properly before practice sessions.
- Hamstring stretches: Reach for your toes, keeping legs straight.
- Quad stretches: Pull your foot towards your glutes.
- Hip flexor stretches: Kneel and push your hips forward gently.
Mobilize your ankles, arms and shoulders with small circles as part of your warm up.
Step by Step to Perform a Front Tuck
Follow these steps carefully to learn how to do a front tuck safely and effectively.
Step 1: The Approach
Start by running or taking a few quick steps. A running start helps build momentum for your front tuck. Your approach should be smooth with long strides, chest up and head forwards.
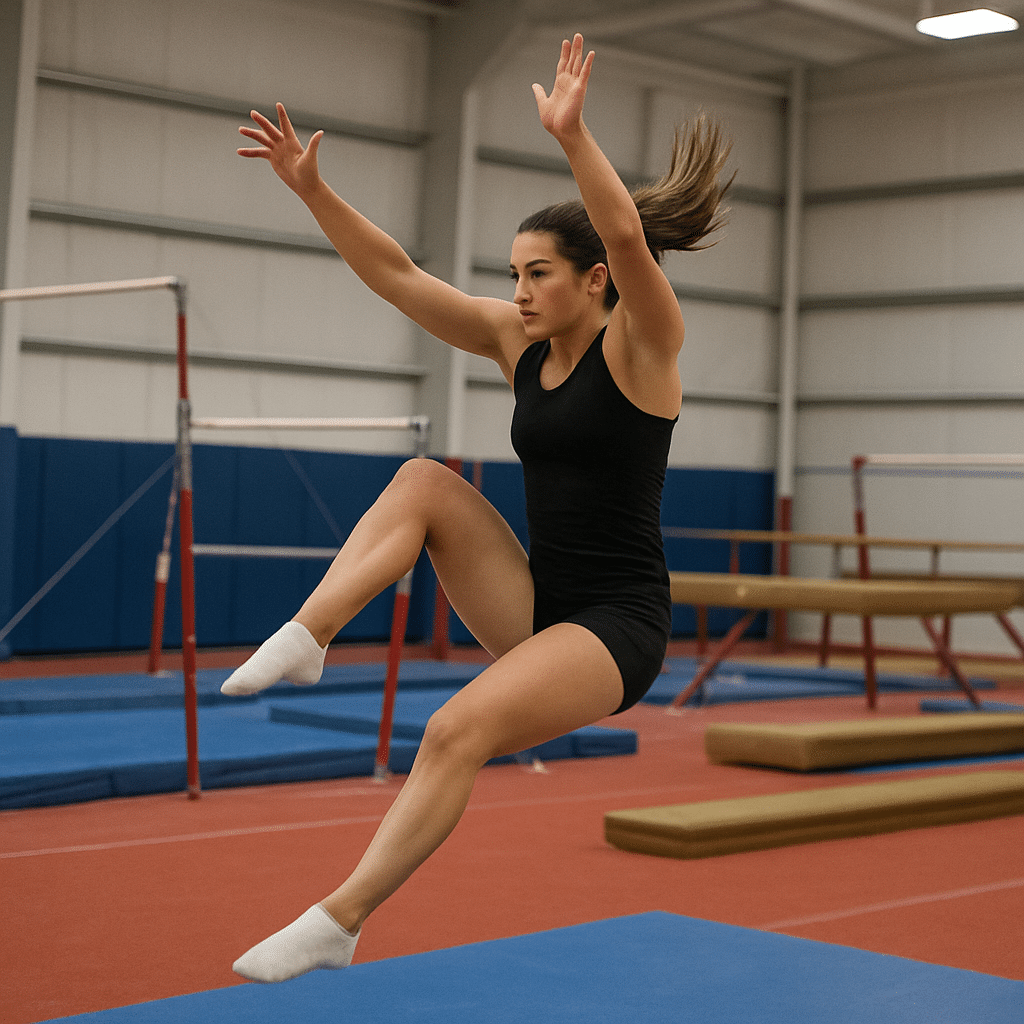
Step 2: The Take-Off
The take-off is crucial for a successful gymnastics front tuck. Get this step wrong and the next steps will be difficult to complete. Plant both feet firmly on the ground, shoulder-width apart. Swing your arms upwards while pushing hard off the ground with your legs. The goal is to jump upward rather than forward to ensure enough height for rotation.
Once in the air, stretch at your body by driving your arms up to your ears and keeping your chest open and hollow.
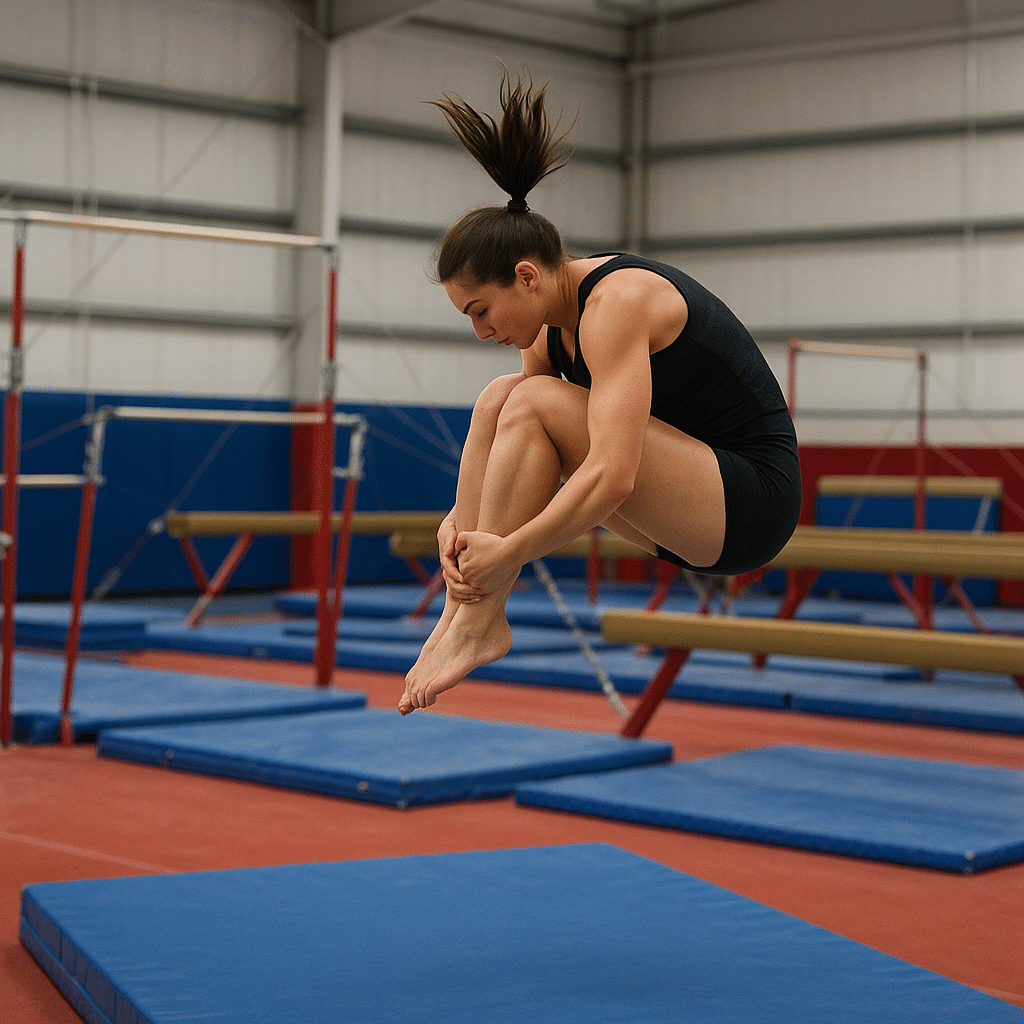
Step 3: Tucking in the Air
After you hit the stretched shape, quickly tuck your knees to your chest and bend at the hips. Move your shoulders down and forwards to wrap the tuck shape in more. Arms come down so that you can grab your legs just under the knees. Left hand grabs left leg and right hand grabs right leg (do not cross hands). Squeeze your bidy tight and keep your chin down towards your neck.
Step 4: Opening Out
You must open out of the tuck shape as the rotation is almost complete. The timing has to be good or it will cause either an under rotation (early opening) or over rotation (late opening). Start the opening by releasing the legs from your hands then lifting your arms and chest and extending your hips.
Step 4: Spotting and Landing
As you open up, look for the landing area. Spotting the landing helps you gauge your rotation and prepares you to land safely. Extend your legs slightly when you see the landing area clearly. Land softly with knees slightly bent to absorb impact.
Common Mistakes In Front Tucks
Most common faults can be attributed to a poor take off at the start of the salto. If you attempt to do a front tuck without having mastered a proper punch through the floor and take off position you will almost always end in failure.
You should continue to work with a trained spotter until you and your coach are confident that you can attempt the front tuck solo.
These are common mistakes when practicing your front tuck gymnastics.
Somersault does not rotate enough before landing (under rotation). This is caused by at least one of the following factors:
- Lack of jump – Not enough height is created on take off.
- Lack of stretch on take off – Arms and chest should lift on take off.
- Tucked to slow – The change from stretch to tuck should be quick and snappy.
- Lack of tuck – The more you tuck your knees into your chest, the quicker you will rotate.
- Lack of strength – Your stretch and tuck shapes should have good body tension.
Somersault rotates too much (over rotation). You know you have over-rotated when you fall forwards on landing.
- Didn’t open out – You must open out from the tuck shape before landing.
- Jumped too high – This will create extra time in the air and potentially means you rotate for too long.
Over rotating in a front tuck is a good problem to have. It means your take off has enough power and your body has enough strength to perform the salto but you just need to adjust your timing and technique. This is simpler to fix than an under rotated salto so don’t be too worried if this happens – you are certainly making good progress.
Your somersault is low and long. A front tuck is considered low if it doesn’t go above your shoulder height.
- Take off is performed leaning forwards. This will kill your height.
- Take off shape is piked in the hips. This forces you to drop your chest and again affects your height.
To fix a low and long front tuck salto you should start with analyzing your steps in the run up. The steps should be smooth, long and low into the hurdle step just before you punch through the floor and take off.
However, if the last step is too high or too low it will affect the angle at which they take off.
The same mistake is common on the Trampoline as well except the gymnast is jumping rather than running into the take off. If the gymnast drops their chest and head forwards on the take off it will create a long and low salto or worse still an under rotated salto.
Front Tuck Drills
This is a list of effective front tuck drills that we use at Synergy Gymnastics when teaching. Drills should always be performed with a trained professional who is able to spot you safely.
Most drills can be performed on gymnastics mats, inflatale mat or a trampoline.
Rebound Tuck Jumps
Stand with your feet shoulder-width apart. Jump upward and bring your knees tightly to your chest. Repeat multiple sets of 4 to 5 jumps without stopping to improve tucking speed and form.
Front Rolls
Practicing front rolls helps you get used to forward rotations. Roll smoothly and quickly to learn the tuck motion. This drill builds confidence in rotational movements.
High Front Rolls
Build up a stack of mats or inclined slope so that you have to jump up into the roll. The mats will be soft but keep your chin tucked down to prevent your head colliding with the mat.
Roll To Kick Out
Perform the regular front roll but kick out to hollow dish 3/4 of the way through the rotation. Finish on your back. This helps get the timing of the kick out and spotting your landing. The kick out should be quick and snappy.
3/4 Salto to Back
This is commonly done on a trampoline with a spotter throwing in a mat to begin with. You perform the salt but land on your back in a similar shape to the previous kick out. The aim now is to perform the salto without the hands touching the mat or floor like you did in the roll.
Spotter-Assisted Front Tucks
Having a trained spotter help you practice initially provides safety and confidence. The spotter can assist you in rotating correctly and safely. Gradually reduce assistance until you feel comfortable performing independently.
Practice your front handspring separately until you feel confident. Then combine it with your front tuck. This variation significantly boosts your gymnastics routine difficulty and impressiveness.
Further Progressions
After you have mastered your front tuck it opens up a number of exciting new posibilities and further progressions.
Change the Shape
The obvious next step is to learn the front salto in different shapes instead of tuck. Usually gymnasts progress into Pike front and then layout (straight). Once the Layout has been mastered the gymnast can then add twists to the salto.
Front Handspring
A front handspring front tuck combines a front handspring followed immediately by a front tuck. As you come out of the front handspring you will need to lift your chest and arms up and into the front tuck.
Walkout
The front tuck walkout is a personal favorite as it looks elegant and creates an exciting start to a longer tumble. The walkout involves the gymnast landing with one foot and then qucikly onto the other so they can reach forward into a round off. Excellent timing is required.
Punch Front Tuck (No Run Up)
The punch front tuck involves a powerful two-footed take-off without an approach run. This advanced variation demands excellent strength and timing. Practice jump squats to enhance your power.
Safety Tips for Practicing a Front Tuck
Due to the jump and rotation involved in a front tuck there is an increased chance of landing on your back or neck when something goes wrong. For this reason always practice your front tuck gymnastics safely:
- Train on soft mats or foam pits initially.
- Work with a qualified gymnastics coach to correct form and technique.
- Avoid practicing when fatigued to prevent injuries.
- Gradually progress from mats to harder surfaces as your confidence grows.
Safety should always come first when learning how to do a front tuck.
Front Tuck Progression Timeline
A clear timeline helps structure your training for gymnastics front tuck mastery:
- Weeks 1-2: Strength and flexibility training, basic tuck jumps.
- Weeks 3-4: Front rolls, basic approach and take-off drills.
- Weeks 5-6: Assisted front tuck practice with a spotter.
- Weeks 7-8: Independent front tuck attempts with mats.
- Week 9 onwards: Advanced variations and landing practice on firmer surfaces.
Stick to this timeline consistently to see continuous improvement.
Final Thoughts
Learning how to do a front tuck requires dedication, patience, and practice. Following this guide closely will help you master this essential gymnastics skill safely. Consistency and persistence will lead to impressive results and a powerful, confident front tuck. Now, get started, and have fun mastering your gymnastics front tuck!
FAQs
What drills help prepare you for a front tuck?
Practicing exercises like tuck jumps, forward rolls, hollow body holds, and 3/4 flips on a trampoline can significantly improve your timing, coordination and technique making it easier to master the front tuck safely and confidently when attempting it on the floor.
How long does it take to learn a front tuck?
Typically, mastering a front tuck can take a few months, depending on your starting skill level, strength, and consistency. Regular practice, quality coaching, and targeted conditioning drills greatly accelerate your learning process and build your confidence.
Is it safe to learn a front tuck at home?
Learning a front tuck at home carries higher risks, especially without proper mats, spotting, or coaching. To minimize injury, practice basic drills and conditioning safely at home, but seek professional supervision when you’re ready to attempt the actual skill.
Why am I landing low when doing my front tuck?
Landing low usually happens due to insufficient rotation or not setting high enough initially. Improving your takeoff by driving your arms upward strongly and tucking tightly during rotation can greatly help you achieve a higher landing position.
What should I do if I’m scared to attempt a front tuck?
Feeling fear is common when learning flips. Start by practicing smaller progressions and drills, ideally with mats or professional spotting. Gradually building up to the full skill can boost your confidence and make attempting a front tuck less intimidating.
- How to Do a Front Tuck: Step-by-Step Guide To Flip
 This detailed guide will clearly explain how to do a front tuck somersault safely and successfully. The front tuck is an advanced skill so therefore… Read more: How to Do a Front Tuck: Step-by-Step Guide To Flip
 - How to Do a Back Handspring: Complete Step-by-Step GuideLearning how to do a back handspring is an exciting milestone for any gymnast. It builds confidence, agility, and forms the foundation for advanced tumbling… Read more: How to Do a Back Handspring: Complete Step-by-Step Guide
- How To Get Over a Mental Block In Gymnastics: A Complete GuideGymnastics is a sport that requires not only physical strength and skill but also mental strength. When a gymnast feels like they cannot attempt a… Read more: How To Get Over a Mental Block In Gymnastics: A Complete Guide
- The Best Leotard for Girls in 2025: What to Look ForFinding an ideal leotard for girls isn’t just about picking a dazzling design that sparkles (although it does help!). The leotard has to fit perfectly,… Read more: The Best Leotard for Girls in 2025: What to Look For
- The Best Gymnastics Shorts (Our Top Picks)The best gymnastics shorts are designed to be worn over the top of a leotard providing additional coverage around the upper legs, whilst allowing gymnasts… Read more: The Best Gymnastics Shorts (Our Top Picks)
- Decathlon Leotards – Are They Any Good?
 If you’re in the market for a new leotard, you may be wondering if Decathlon leotards are any good considering the low cost of their… Read more: Decathlon Leotards – Are They Any Good?